Pages

Showing posts with label sewing. Show all posts

Friday, September 6, 2013

Sewing for 'Lil part 2 (a whole wardrobe!)

 *I just want to start this post by apologizing for the total mess in the background of most of these pictures.  Sometimes you just deal with what you can get!


So I mentioned before that 'Lil only wears dresses.  That isn't exactly accurate. I figured out she just is only willing to wear one article of clothing at a time. So she'll wear just a pair of pants as happily as just a shirt or just a dress, which is why we always choose that last option!

So here's the story of how I did an entire wardrobe for my girl for less than $20.

When I started, 'Lil had 2 play dresses, one of which was getting too small. Now she's got this:

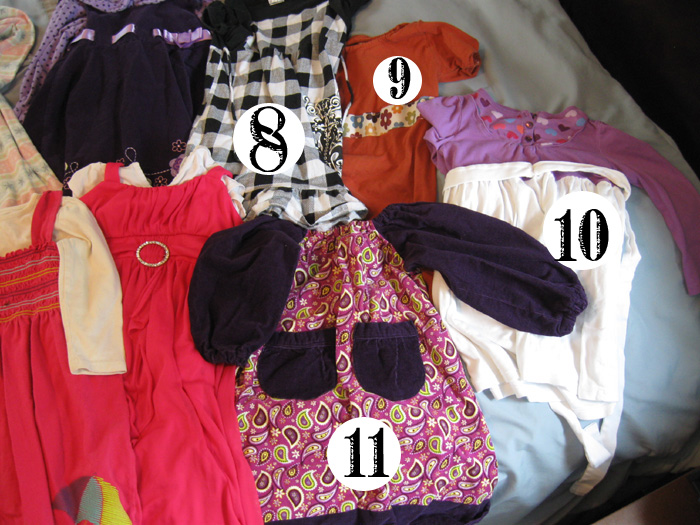
(the two we already had aren't in this shot.)  I'm going to break this down with all the links for the tutorials I found too.

1: ($5.47) this is a group of 3 dresses that I got from Threadup when they were having a special (it was $15 off for first time costumers, so I only spent on shipping). So $5.47 so far.

2: (free) This was a man's shirt I got for free, then I followed THIS tutorial to make it into a dress.  Except for the sleeves - at first I tried to just leave them  . . . .

Not so great! So I cut them off, sewed a bottom band to gather them in, and the final result is MUCH cuter!


(ok, I still need to hem it up a bit, but hey, it works)


3: ($8) I already talked about this one, and it was by far the most expensive one of the bunch  (WHY is fabric so gosh darn much?)  and you can get the pattern HERE.  So $14 for 5 dresses so far.


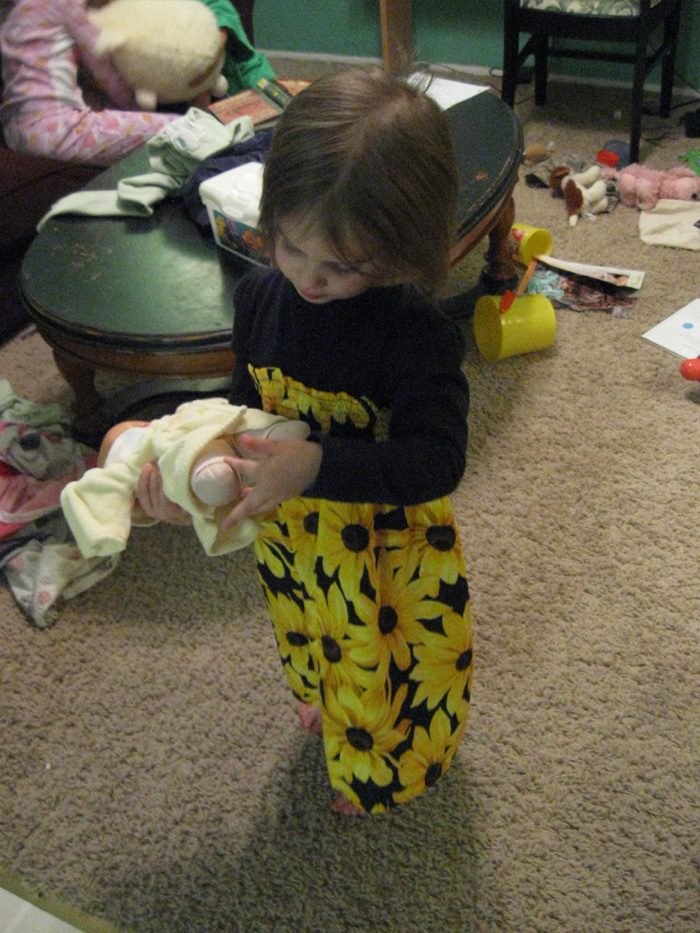
4:  (free) This might be my favorite one of the bunch.  I took a black long sleeved t that fit her and a women's skirt I got for free and combined them.  The skirt had a shirred waist, so really it was just sewing the two together. 

5: ($2) thrifted from goodwill (so $15 for 7 dresses so far)

6: ($1).  One of these jumpers was a hand me down, the other thrifted for a buck, but both of them I took old t shirts and sewed them to the straps.  That way she thinks it's only one dress and will still be covered!)

 7: ($1) another thrifted dress, but I did the same sew-the-shirt-in trick as before.

10: ($1) this was the easiest BY FAR of them all. It's a size 8 shirt.  Fits my size 4 like a dress - what could be better!
 
 
9: (free) I followed THIS tutorial, but then realized I hated the sleeves. So I cut them off, trimmed them a bit, then sewed them back on.  I also wanted a waist line, so I sewed the ribbon on.  Super easy! 

10: (free) this is a mix of a bunch of tutorials, but mostly THIS one.

11: (free) I had a friend give me the fabric for this one, and I sewed up a little pesant dress, mostly following THIS tutorial, but there's dozens of them out there!

At this point I counted up how many dresses we had (14 if you're wondering), and decided that was enough. But I have ideas/supplies for about 5 more, so we'll see.


It really helps that I had a bunch of adult clothes given to me for free, but it really isn't to hard to save a bundle on your kid's clothes!

Monday, August 12, 2013

sewing for 'lil

So 'Lil has decided that dresses are the only thing she's willing to wear.

Which is weird to me.  First of all, because I HATED dresses as a kid.  Second of all, because Girly-Lou couldn't care less about what she wears, so it's very different to have a girl that's picky. 

And of course, I don't have 8+ dresses I'm willing to let her wear every day either.

Because of all this, I'm in the process of buying/thrifting/sewing a whole wardrobe for her.  Pintrest, of course helps with the ideas.

A couple of days ago I found a pin to THIS page, and she was asking for pattern testers for a cute dress. I've always thought it would be fun to be a pattern tester, so I filled out the form.  The next morning I woke up to FOUR emails from the blogger with all the info and asking to have the dress ready 48 hours later.  (cue panic attack!)

It was a VERY crazy day, but in 24 hours, I did this:


she was mad I was taking pictures, but she really loves the dress

Isn't it adorable! 

Now, the pattern wasn't perfect (yet!), but it's a great basic dress that I could do a dozen different variations with.  I'm super excited to play around with it some more!

Thursday, September 1, 2011

my big church bag- and a GIVEAWAY!


A few months ago, I was "upgraded" in my church calling. I now have way too much responsibility (though, at least I'm not president!) and a big honkin binder I need to lug everywhere.

My cute really cheap tote bag was now not adequate for all the stuff I need. So I was on the hunt for a nice huge bag to take to church.

While looking for a fabulous purse to maybe sew, I stumbled up on this tote bag pattern:

Super easy, and cute too.

I mostly followed her easy instructions, with just a few changes.

First of all. I needed it to have a much wider bottom. So instead of making the bottom triangles 4" (it will make sense when you read the pattern), I made mine 7".

I also added pockets and an extra bottom pattern like she did in her other version.

While finding a purse to sew, many people suggested using plastic canvas to make it stiff and stand on its own.  The tote pattern suggested fusible fleece. After seeing the price tag on that stuff (it was almost $8 a yard!), I went for the plastic canvas option ($0.45 each!).  Here's how I did that part.

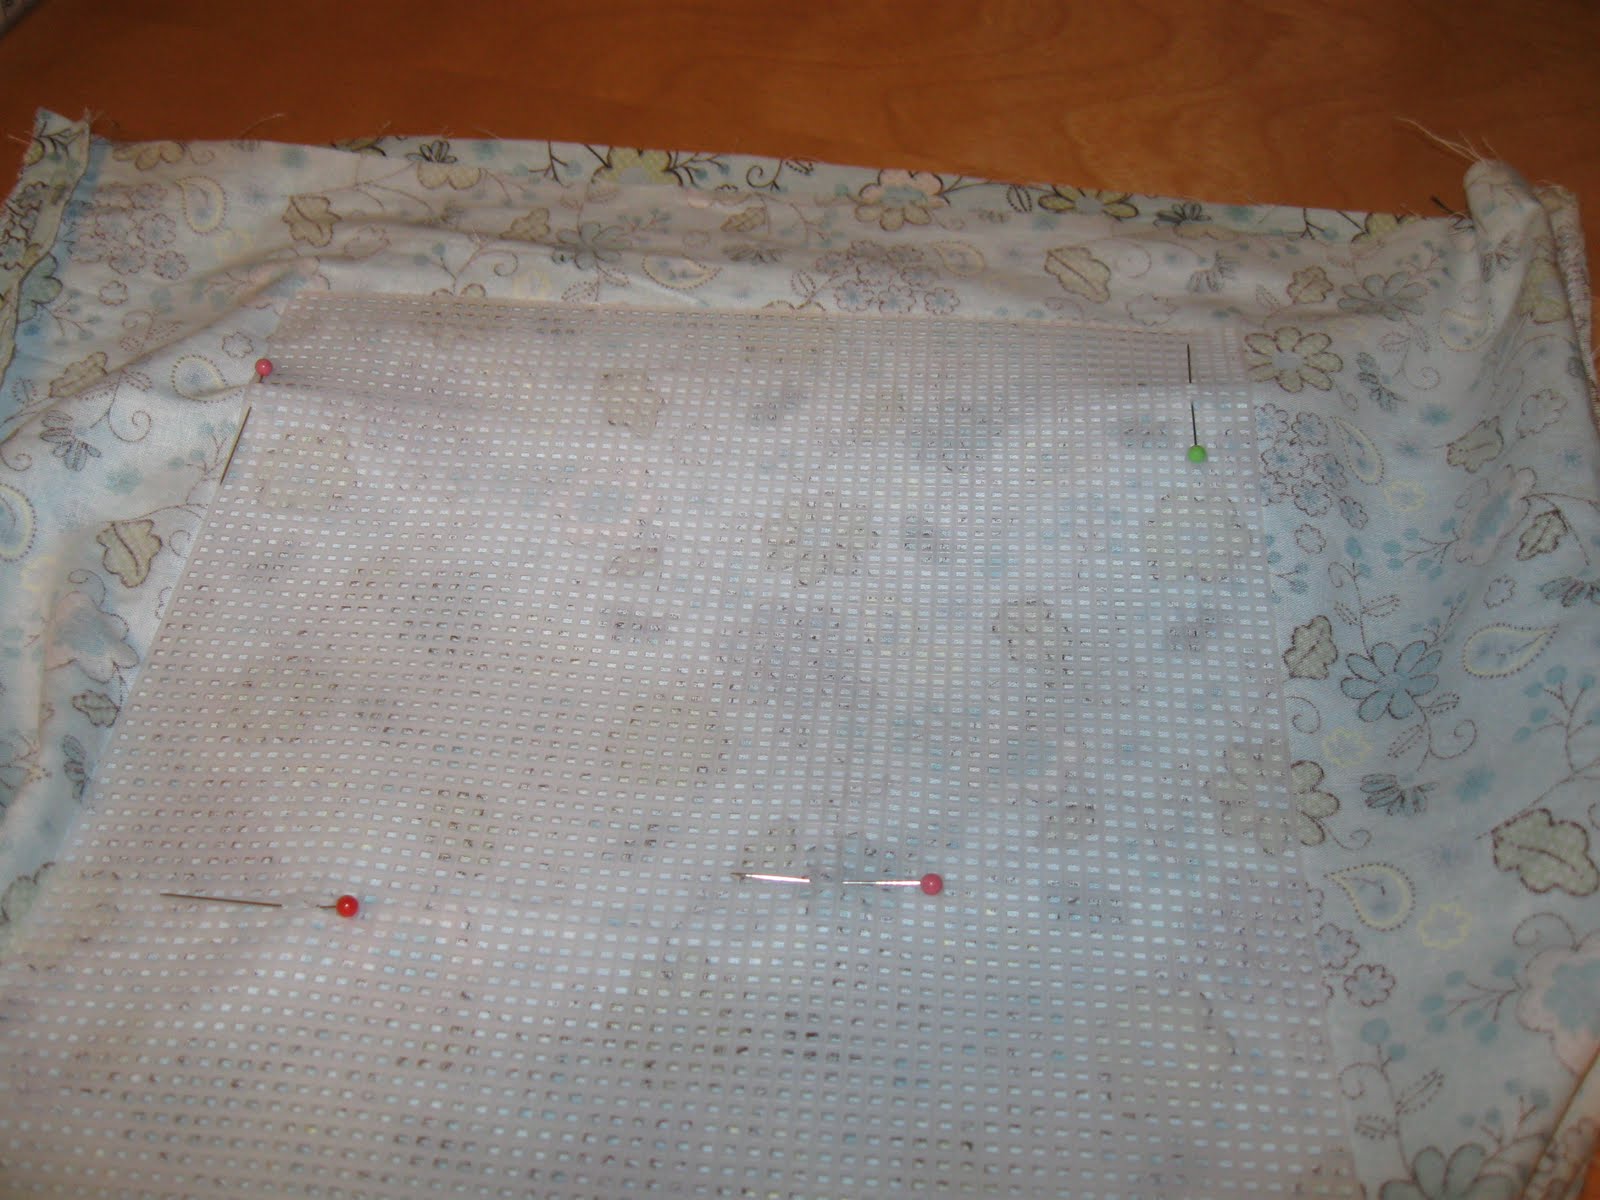
I made the lining just as the pattern instructs. After cutting off the bottom triangle thingies, I lined up a piece of plastic canvas with the bottom corners:

And pinned it all over to keep it from moving around.

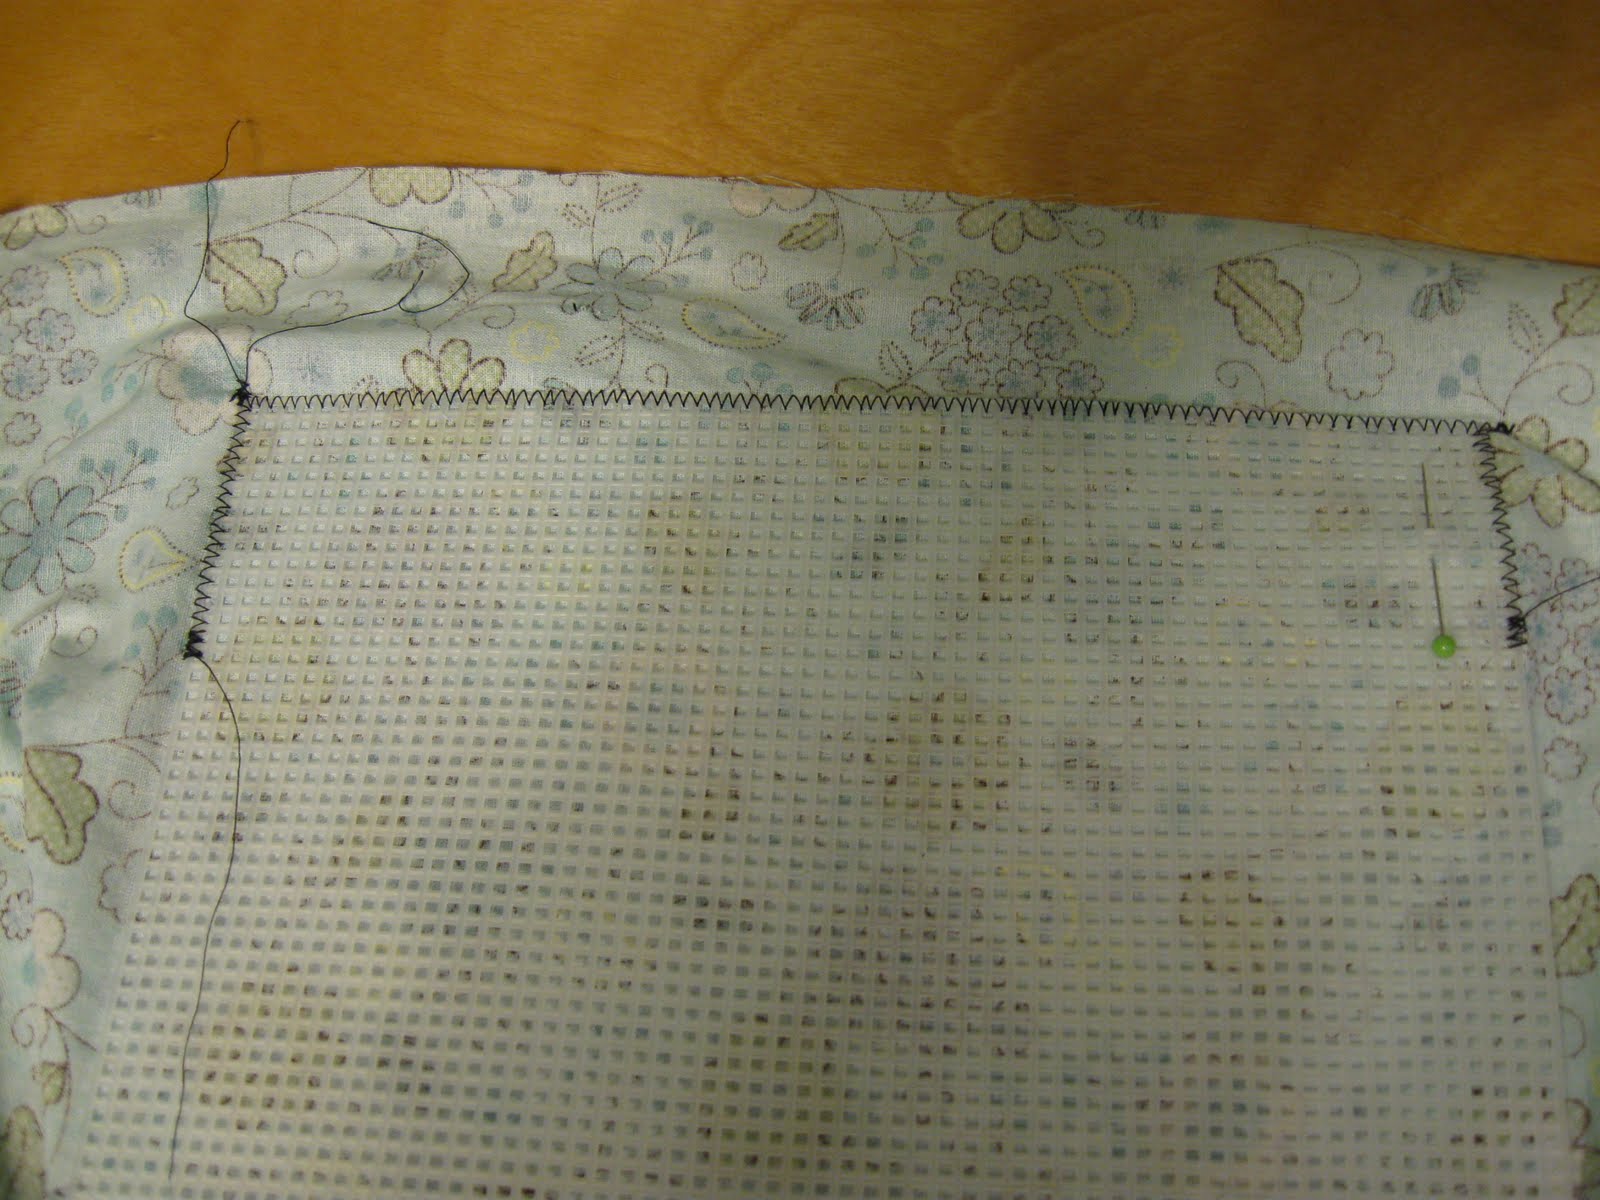
Then, I just VERY SLOWLY zigzagged around.

No, my stitch length didn't exactly line up with the openings of the canvas. That's why I went slow. I could actually feel the needle slip off the plastic into the squares once and a while.

I wasn't sure I could actually sew around all 4 sides on both pieces, so I just did a bit along the top & sides to make sure it didn't slide everywhere.


I repeated this with the other side

And . . .

Tada!


I'm super happy with it.  I didn't think about the fact that increasing the bottom would decrease the sides, and I wish it would have been about an inch taller:

But still, it's so nice that I can actually fit everything in there!


So, on to the giveaway. . . I bet you guys are thinking I'm giving one of these bags away, right. WRONG!

Guess what came in my mailbox the other day . . .


Yup! Book 6 in the Sadie Hoffmiller series.

Guys, don't read this one at night.  It's kind of creepy.  And there's a big old plot twist, again, that I did NOT see coming, but changed a ton for me.  You'll love it.  And,

To win your own signed-by-the-author copy, leave me a comment with either the title of a book you love, or a book you'd like to read.  Comments will close Sunday, Sept 4 at 7:00 central time, and I'll announce a  winner Monday morning!


*disclaimer shma:  I received two copies of this book as part of my participation in the test kitchen.  But I only give one away, 'cause I want to keep one too!


BWS tips button

HookingupwithHoH


Thursday, June 30, 2011

Summer Sewing

I've never done a ton of sewing for my kids. I like making dresses the most, but currently both of my daughters have 6 EACH. Not exactly something they need!

The biggest problem with sewing clothes, is by the time you pay for the pattern, the material, and all the notions, you can usually buy it cheaper.

But if you find a free pattern on line . . . it changes everything!

I've been following Sewing in No Man's Land for several months now. When she posted this pattern,  I knew I had to try it!

One note on her patterns: they are NOT super accurate. She talks about that on her patterns page. She doesn't have any fancy program or anything, so you need to do a bit of "intelligent sewing". Just go with your gut for how things should go.

So here was my first attempt:

This one turned out to be free: I bought the fabric like 7 years ago when I was pregnant with Girly-Lou. The white was leftover from my maniac sewing back in November, and I already had the Velcro too.

I love it . . . except for the sleeves.  They stick up so high I feel like they are trying to eat her ears!  But it's still awesome.  I also really changed the pants. My first attempt looked like clown pants instead of shorts.  So I cut off several inches on all the pattern pieces - both length and width.  They were MUCH better the second attempt!

So I thought I'd try to change the sleeves so they stuck down more.


I first tried shirring the hem. It helped, but they still went weird. I finally ended up sewing in a 1/4 inch elastic strip and tucking the sides of the sleeves back into the bodice to help them stay down.

This one is not my favorite, but she sure is cute!

It's also a freebie (I already had the fabric and everything)

But #3 was the charm.

I did buy the fabric this time, but since it only took a yard (with a 40% coupon), that only set me back $2.


For the sleeves, I took a 7 inch strip of 3 inch eyelet  and just attached it to the the shirt bands.  It's my favorite by far!  The eyelet was on clearance for $2 each, and it took two spools for it all.  So total this one was about $6.

To make it sound even better, let's combine all of them. So I can say I made 3 full outfits for $6.  Not bad at all! 

*no children were hurt in the staging of this post. Although many bribes were used, the author is not liable for the aggravation of trying to pose 17 month old adorable girls!

Wednesday, April 13, 2011

Wish I had a good title to put here . . . !

But I don't.

Last Friday, I painted my kitchen. I'm in love with the color. But you don't get any pictures.

Nope. That would require cleaning my kitchen.  And I'm apparently incapable of doing so right now.

Actually, I kind of am. You see, I have this crazy cold. My head feels like the size of a watermelon, my nose is raw from blowing, and any physical exertion causes window shaking coughs to emerge from my scratchy throat and scare my children.

Not so fun around here.  But my kitchen is pretty - and I'll eventually show you. For now, just so you know I'm doing more than taking 3 hour naps (yes, I've been doing that also!), here's what I've been working on:

(See, sewing is not NEARLY as aerobic as sweeping or doing dishes. Much more my current speed!) 

Buddy's quilt is almost done! Now I just need to figure out what the back is going to be, do all the quilting, and binding, and all that jazz. Then he'll just start bugging me even more for when his room will be finished. Someday little guy. Some day!

Monday, November 22, 2010

I always wanted to be a Von Trap.

Query: Does using curtians to make your child a dress, make you an Austrian almost nun?


So, on Friday, I found this:


Isn't that a beautiful dress? I have yet to find a Christmas dress for Girly-lou, and thought this would be just perfect! In my last post, this was the project I mentioned was supposed to be super easy, but was TOTALLY NOT! Ok, that's a lie. Actually, it went reasonably well, until I tried the silly thing on my daughter. And found it was way. WAY too short.

Sigh.

So here's how I made this my own.


First: I totally planned on running out to pick up some fabric. But Lil was sleeping, and I was also babysitting some extra kids. So being the amazingly patient person I am, I scoured my small fabric stash instead. And found this adorable pink stuff that Happy Mom had given me when she was de-junking her stuff (thanks sis!). For the accent, I honestly and truly used the valence portion to the curtains in the girls room. I was never super crazy about the cut on these (three very VERY long triangles), but kept the stuff because I love the fabric. And off I went!

First snag: the pattern is not super easy to follow. I am no stranger with my sewing machine, but there were some steps that just were not listed! So I punted (I'm pretty sure punted wrong on some places, hence the major hiccup later).

Second snag: making the button loops. The instructions say that it's easy to turn this microscopic tube. Well, I sure couldn't do it! I needed some back up help for that part. So after a 20 minute struggle, I gave up, made some double fold bias tape, and decided I could live with seeing some stitching.

Third snag: After sewing the entire bodice - WITH top stitching, AND attaching it to the skirt, THEN I decided it needed sleeves. Phooey. I made my sleeves by cutting out a piece, 6 inches by 25 inches (for each sleeve), doing a double fold hem along one long side, and sewing up the underarm seam on with the two short sides. Then I ran a gathering stitch along the other long side, adjusted it to fit inside the arm hole, and just sewed again along the previous top stitching. Not the most ideal or perfect look, but I'm happy with it.

not going to win any ribbons, but if you're close enough to notice, you're going to be family anyway!

Fourth snag: There are really no instructions for making the sash. Seriously. So I just assumed how it was supposed to go, and think it was ok.

MAJOR HICCUP: This dress is supposed to hit mid to lower calf. When I tried it on Girly-Lou, it was hitting smack dab in the middle of her knee cap. Which first of all, looked goofy, and second of all, if she grows at all in the next month, it will be too short for her.

Triple sigh.

At first, I thought I would just make another skirt. Annoying, yes, but not too bad. But then I found out there was not even close enough fabric left over for a whole skirt. Grumble grumble. I also felt that the band was too small (that really bad punt at the first) and the sash was too big. So, I unpicked the entire band (with top stitching), and then the entire sash.

I made band into the sash, and the sash into the band, and then added a SECOND band made out of the skirt material.

that bow makes me happy.

This involved a full HOUR of unpicking. SOOO not my favorite activity. But eventually, I made it through.

back view

So, the moral of the story. If a pattern is confusing, take the extra day to email the author back and forth so you can actually understand the instructions!

I promise, it will help. And curtians really are some great sources for fabric!

Blogging tips