Pages

Showing posts with label silhouette love. Show all posts

Monday, July 11, 2011

Happy blocks

I've had this picture on my desktop for months now.
I found it on some linky party and have wanted to make it ever since. (sorry, I can't find the link to the source though!)

My biggest obstacle? I don't have a saw to cut the wood. Yes, I have a fabulous sister who would let me cut any old time at her house, but that required to have enough motivation to actually go get the wood and figure out sizes and such.

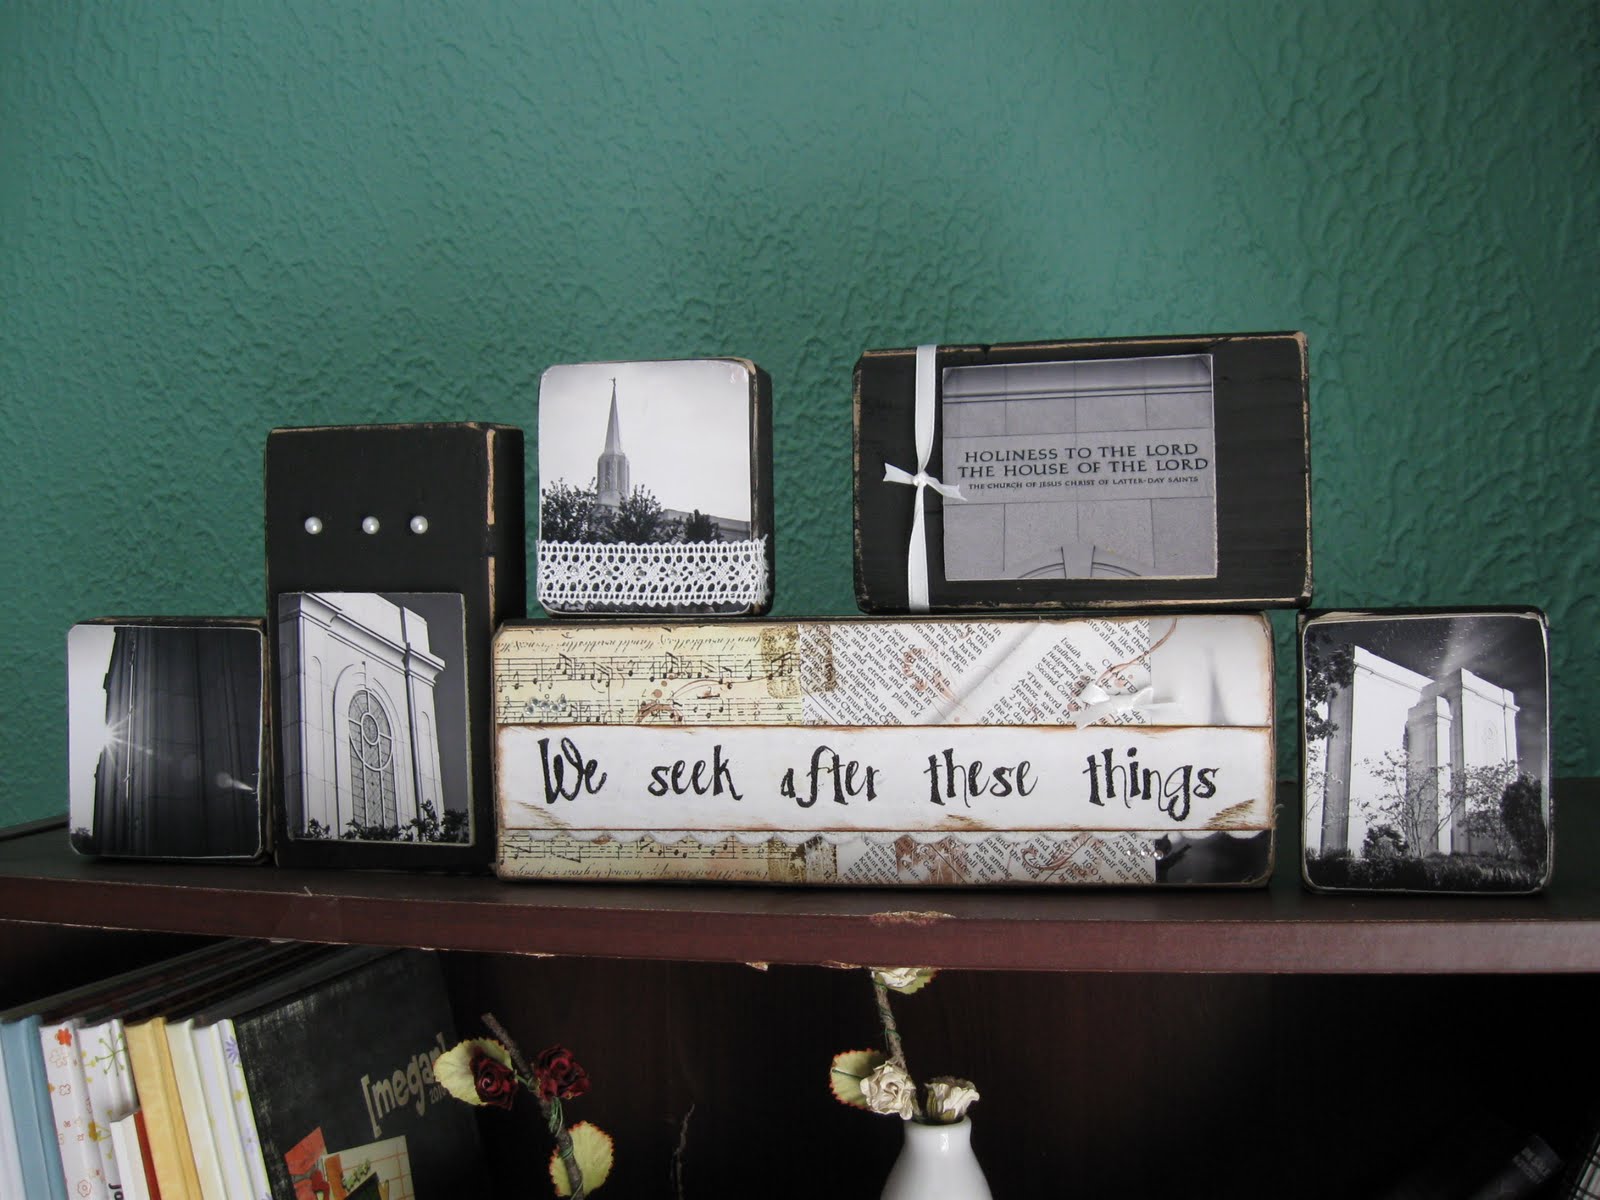
Last month our church did a craft night. We made these beautiful temple blocks with pictures of our local temple.  When I took mine home, I realized I had just enough blocks to make the saying. I'm a fan of double duty crafts (less to store!), so I flipped those blocks over, modge podged some scrapbook paper (I also inked the edges), and slapped on some vinyl cut with my Silhouette.

Swoon! I adore the way it turned out. Now, obviously, I didn't do it exactly like the inspiration picture. But I had just the right about of room, and I'm very happy with the results!

(and since I know someone will want to see the temple side too)

Linking up here

*in case you're wondering, the paper came from Michaels and Hobby Lobby. The fonts for the vinyl are Pea Aimee, Century (the &), and Bookman Old Style (the love).

Thursday, May 26, 2011

A special place for special things

I may have mentioned it before, but Girly-Lou is a bit of a hoarder. Every paper colored at church, every note given to her from anyone, every card/letter/gum wrapper she's ever received, she wants to keep.

Add that to the fact she's in kindergarten . . . let's just say the clutter in her room needs some working on.  For the last year, I've wanted to make a magnet board. Somewhere she can keep some "special" papers. 

And today I finally did! One for her and Buddy. 

It started with these thrifted frames (90 cents each!). 
White works well in the girls' room. Buddy's frame got a quick coat of dark brown spray paint.  Then I used a roll of metal flashing (I think it was about $7). I measured, drew a line with a sharpie, and cut it with my kitchen shears.  Then I hot glued it onto the back of the frames. I covered this in some at hand fabric, and stuck it back in the frame. 

Tada. Two clutter catchers for about $3 each!

They needed a little something more, so I pulled out my Silhouette and made up a little vinyl for the corner.

Why did it take me this long to do this!
That's the last thing I want for the girl's room.  And the first craft done for Buddy's. You'll be getting a bunch of stuff for his room over the next while as I finish it up!

Linking here.


*yes, I know you can see my kid's names. I'm ok with that. I've decided I don't really need to hide all names. But I'll still call them by the codes here, 'cause it's more fun that way!

Thursday, March 10, 2011

Scherenschnitte and other new vocab words.

(yes, I want to say bless you after that title too!)

SO I should be packing for a fabulous trip to see some family tomorrow. But, since the plane is now full, we aren't leaving until Monday. So instead I thought I'd kill some time on the computer.

'Lil has Roseola. It's one of those diseases that I've heard about, but never really thought about before. I had no idea she had it until last night, when she broke out in this weird rash all over her body.

On the plus side, I know why she had a pushing 105 fever for a couple of days. And, once the rash shows up, they aren't contagious, and are pretty much over it. And since there isn't a thing a doctor could do for it, it's really ok that I never took her in.

A few months ago, I learned about scherenschnitte from this site. Her work is amazing! (even more amazing, check this place out!) Scherenschnitte is basically German for really REALLY fancy paper cutting. I love that she posts free templates. She does it all with an exacto knife. I prefer to let my silhouette do the work!

(this was totally Happy Mom's b-day present. The first one was cuter - with blue paper. But it was too big for the frame.
So she got the less cute cream paper instead!)


My son is currently declaring every toy in the room as a "bad guy." This of course means that he then gets to knock them over and make strange sounds. Listening to boys play is always interesting!

Thursday, March 3, 2011

A project 3 years in the making

*Those of you joining this party from a linky: I ramble A LOT! Keep on scrolling, you'll get to the good stuff soon!

Back when I still lived in Euless, I came up with a couple of different growth chart ideas. I wanted it to be on a board so we could take it with us. I had great intentions of adorableness - a personalized for each child. But I never worked on a single one. I never even bought a board to start. I just dreamed.

When I was drooling over getting a Silhouette SD, I entered a couple dozen contests to win one. Every contest was the same format "go to the website, look around, then come back and tell me what you'd make first if you win!" After about the third contest, I stopped going to the website (I had it MEMORIZED by that point!), and would just say that I wanted to make a growth chart for my kiddos.

When I got my silhouette, I had great intentions of whipping out a growth chart. It even came with vinyl!

Then I opened the box. And realized that it came with cream vinyl. Which really only looks good on darker paints. Which is totally not conducive to a growth chart.

So I had to order black vinyl. And wait for it to come. Once it did, of COURSE I had to let it sit on my counter for three weeks before I got around do doing anything about it!

Once I finally sat down to make it, I had to come up with something for the top, which of course took another week or two. Then I had to actually cut the vinyl. And paint the board. And . . .

Anyway, it's finally done. And I love it!

First off, some fun pictures of the end result:


I wanted to have it go up to about 6 ft 4 and then the art work. But my ceiling height did not cooperate.
Instead I cut off about 7 inches from the bottom - who needs the bottom foot anyway! I plan on putting in everyone's birth height, just for extra cuteness!

It's screwed straight into the wall (with drywall anchors to please my hubby), so it's not going anywhere.

Want to make one of your own? Keep on reading! If not - just scroll through and fall in love with the pictures! (or go make cookies - whichever will make you happiest!)

Step One: grab a board. Mine is a 1x6x6, and set me back about $5. In hindsight, I kind of wish I would have gone for the 1x8, so choose wisely. Go ahead and paint it your desired color now.

Step TWO: if you have a Silhouette, you can use this jpg to take out a lot of the hassle.

Step Three: Get the file ready to cut.

Yes, I do realize that I left out the actual cute part. Here's the scoop. I did a lot of searching to come up with that idea. And I mean A LOT!! I finally found it at a digital scrap booking store. Yes, I could have just stolen the idea and done it myself. But that didn't feel exactly honest, and it was worth $2.67 for my integrity. So you can feel good about yourself too, pick it up here.

You back? Great! Ok, so the size of the GROW png is totally wrong. So here's what you do.

First open up the Silhouette Studio. Then go to file>open. Change the file type (at the bottom) to all files, and find your .png grow file. This is what your screen should look like:


First I re-sized it a bit, so it was taller (2.945 x 7.075 to be exact!) Then, to change it into a cut file, grab your trace button (right hand side, 5th from the right.) click on "select trace area", and drag a box around the shape. Your screen should look like this:


Uncheck the high pass filter box. I also changed the threshold to 86% (this helps to get all those little lines in)
Now click "Trace".


Hooray! You did it! You can get rid of the black copy - it won't do anything from here on out.

Now let's size it.

Right now, it's one giant element. We need it separate. So select the whole thing, then Then you need to release the compound path (I do Object>release compound path).


Now we've got a whole bunch of little elements. You'll want to go and make the following compound paths:
  • the letters g and r with the two circles in the letter g
  • the word "verb."
  • the words "to increase"
  • "in size"
  • "or substance."
Sometimes it hard to know if you got all the little parts selected. I make it a compound path, then move it around. If all the word moves, just hit "undo" so it moves back to the right part and go on. If you missed something, hit undo so it goes back and then select the part you missed.


Now play with the spacing and size until you're happy. My final sizes were as follows:
  • the outer box (included in the .jpg earlier) is 3.115 x 5.165
  • The gr()w portion is 2.220 x 4.565
  • the definition is 1.465 x 1.325
You'll want the definition to be as large as you can. This helps a TON with cutting out. I eventually made just the definition one compound path (more on why in a minute).

Step Four: Cut it out!

This is where I had some problems. My vinyl wanted to curl up and then letters were getting sliced in half. Eventually, I moved the speed clear down to one and the thickness up to 10. This helped, but didn't solve it. So I cut out just the definition portion 5 or 6 times, and was able to piece it together into one end result.

Step Five: Weed it!

Weeding is removing all the vinyl you don't need. DO NOT DO ANYTHING TO THE TINY LETTERS. Just cut them out and set them aside.
This is key to my cool step.

Step 6: Put on transfer tape - but NOT on the tiny letters.

Step 7: put the vinyl on your board. This is obvious for the regular stuff.


Now, for the little words. First weed out the centers of the letters.

Do not remove any of the other vinyl. Remove all the vinyl together from the backing.

Place on your board and rub to make the whole thing stick. Now peel off the extra vinyl.

This is the only way I was able to get all the little things to stay in line!

Tada! Now it's all there, and you didn't scream in frustration at all those tiny letters moving around and making a mess while you're weeding. (not that I'd know anything about that, all FREAKIN SEVEN TIMES I DID IT!!)

I'm a Link'n up here!
Saturday, February 26, 2011

30 to 30 wrap up


hey all!

Sorry it has taken me so long to report back on my big day! I've been trying to finish up the prizes, and it's taken a bit longer than expected!

I got a lot of very positive comments on my posts. To be honest, after about 10 days or so, I thought you guys would be sick of hearing from me. And in case any of you actually thought I was that dedicated to write every single day, I totally started writing those back in November. My goal was to have them all done before the series even started. I did NOT make that - my favorite post of all (day #30) was written the day before my birthday. In other words, I deliver on time, but need to start months in advance!

Biggest thing I learned - goal wise: I really stink at keeping track of things. I only had seven goals. I made myself a little chart so I could check of each day when the goal was completed. I think I managed to pick up a pencil and mark something like, 12 of the days or something. But I actually worked on most of my goals every single day!

Quick run down of my goals:
  • Water. I rarely made my 100 oz goal. But almost always made the 72 mark. And my body craves more water now, which is always a good thing.
  • Waking up at 6:00. I'd say an 80% success rate. My body is used it the time now, and it's easier to still do this.
  • Scriptures: about a 98% success. I missed a day or two, but I'm in a much better place spiritually now!
  • Exercise: about a 90% success. I've been very happy with how well I've been sticking to exercise. I lost 4 lbs the first two weeks, and then gained 2.5 back when I got a nasty cold. But it's coming of again!
  • Getting ready: Huge improvement here! Before, I waited to get myself ready until the dirty work was done - exercise, cleaning, etc. But I was using that as an excuse to not get ready. I can mop the floor in jeans just as well as pjs. While I still don't always make the 10:00 mark, more often than not, I'm ready for my day about 9:30.
  • Indexing: I did more than 400 names!
  • Scrapbook: I managed to finish 'Lil's first book, and I've got 5 months done on Buddy's.
It's amazing what having a real goal - that I really work on - with a concrete deadline has done for me. I love where I'm at so much more now than where I was before.

Now the fun stuff - PRIZES!!!

I finally decided on 3. The "grand" prize is a love of books. Second place is a love of crafts. Third is a love of chocolate. (you can't tell in the pictures, but I put everyone else's name in a big bowl and my kids picked them out. Nice and random!)

The Grand Prize goes to the person with the most comments (I told you to comment lots!) Which is : Grandma Nelson!!!! Yeah Mom! You win:

The new Josi Kilpack book! It came right in the middle of my series, so I thought it would be a good prize to throw in there.

Second Place: A love of crafts (random pick) goes to:And you win:

This cute plate I whipped up with my silhouette. (actually, this was one of the most frustrating things I've made in a long time. I'll explain a bit more when I do a vinyl tutorial next week.)
Hooray you!

Third place:(another random pick) Love of chocolate goes to:
You win an Oreo Truffle kit (a $5 Walmart card to buy yourself some oreos and cream cheese, the recipe, and a bar of Aldi chocolate to dip them in) Of course, you can do what ever you want with the gift card, but I REALLY recommend doing the recipe! (Mommy J, please email me a mailing address!)

Thanks for playing along with me. It's been a great ride!

Friday, December 24, 2010

wishing you . . .


Hope your holiday is full of cheer and magic!


(and yes, I LOVE my Silhouette!)
Blogging tips