Pages

Showing posts with label crafty craziness. Show all posts

Wednesday, September 17, 2014

This was the worst project I've ever tried.

Let's talk doors, shall we?

I've never liked my front door.  It's old (original to the house, so 50 years old now).  It doesn't fit right (you can see daylight on 3 of the sides, with LOTS of drafts too). And it's kind of ugly.

The previous owners painted it.  It doesn't look that bad from away:

But up close, it was an AWFUL paint job.

I  really want a new one.  But we're considering moving in the next couple of years, and I wondered if I could just get by redoing this one instead.  I thought I'd just strip off that paint and restain it.  Not really that big of a deal, plus I already had everything I needed.

Hahahahahahahahahahahaha - boy oh BOY was I ever wrong!

So here it is, mid stripping:


At this point, I had already spent close to 10 hours on it. I ran through all my stripper in the first coat.  Then I started scraping and discovered that there were NINE different colors of paint on this door.  I scraped and I scraped and I scraped.   As you can see, it was soooo ugly mid point.  One of my problems - I knew my hubby didn't want to do this.  Any big ish project, he just doesn't even want to think about it.  But if I take care of it while he's gone, he's just happy it's over and ok with the results.  And I started this only 36 hours before he came home.  I knew I HAD to get it done before he came back.

I bought more stripper - this time the stuff was supposed to go through 7 layers of paint.  It lied.  But it did get through about 5.  I tried standing it off (nope, my electric sander died instead).  I did everything.  Finally (after close to 20 hours of crazy crazy work), I just decided to give up and spray paint the whole thing. 

Of course, I couldn't get the pins out by myself. So I had to do it in place.  I taped off everything (and used 4 plastic drop cloths to cover the wall, ceiling, and floor all around it.  Then I did 4 coats of spray paint (light, about 30 minutes dry in between) and ended up with this:


I like this door SOOOO Much better now.  Ok, in this shot, it's not completely dry, and WAY not cured.  I left the door open like this all day long for almost a week (only closing/locking it at night). 
 
I'd even say it's awesome, until you look at it closely.  You can see every place that the old paint is still there. There's a ridge each time.  And some stripper got on the door knob, so it's really worn and ugly now.  In fact, it looks downright awful in person, up close.
 
But, BUT - I do like it better.  and it will work until we save up and replace it.  I'm thinking I'll paint the real new door the same color!

Friday, October 28, 2011

Not too scary

One of the blogs I follow makes the most A.MAZ.ING! costumes for her kids every year.

from make-it-and-love-it.com

I don’t.

I’ve never actually made a costume for my kids. Either someone has given one to us, or I bought it on clearance after the holiday.

Last year, she made THIS costume

.

from make-it-and-love-it.com

I filled it away, hoping that I could be a pregnant skeleton this year.

Well, that’s not happening (grumble grumble stupid ovaries grumble!), so we did the next best thing.

Buddy gets the skeleton this year.

IMG_7464

For her husband, she put his favorite food in his belly. Buddy originally thought that was great, but then changed his mind and wanted it blank.

IMG_7466

The only problem I had was finding a solid black long sleeved t. Lots of navy. Lots of already decorated. No actual T’s. I did finally find some men’s shirts. So I took one of his shirts for a size guide, cut down the man’s shirt, and sewed it back together.

Some freezer paper, paint, and patience later and. . .

IMG_7463

Tada!

He LOVES it. It is a bit big, but will also fit him next year that way.

And his favorite part . . .

 IMG_7451 copy

It glows in the dark. I picked up a bottle of this

unnamed

at joann’s for $3. One very cramped hand later, we had a glow-in-the-dark skeleton boy.

Costume breakdown:

men’s t-shirt $6

thrifted pants $2

glow-in-the-dark paint $3

Freezer paper, white paint, brushes, ect: on hand

Total cost: $11

Girly-Lou gets a $10 garage sale queen costume:

IMG_7472

And ‘Lil, I think this year she gets to be a skunk.

IMG_7490

the little stinker!

IMG_7478

Wednesday, October 19, 2011

Who doesn't like a freebie?

I don't usually get into deals and such on this blog. But I'm excited about this one, and thought I'd clue you in on it too.

As most of you know, I LOVE digital scrapbooking. Today, the company that makes the software I use, is also giving away embossing card making kits - you just have to pay the $2.50 shipping.

Check it out HEREHERE

Monday, September 19, 2011

Turning up the heat

One day, Hubby ruined my ironing board.


Ok, that sounds bad.  Hubby is a delightful man who does all his own ironing. So I really can't complain too much. And in his defense, our iron was acting up and ended up completely shorting out.  I just wish he hadn't laid it down on the ironing board when he realized it was happening.

So, for months now, we've tried to iron around this:

It even went clear through to the pad underneath.

Now, I've never liked this cover.  And it was yucky and stained all over too.

So I thought I'd make a pretty one with this fun fabric:


There are lots of tutorials out there to recover your ironing board.  This one and This one were the two that I used.

Trying it on for size before the elastic

All in all, I'm super happy with the results!

 And a bonus - I actually learned how to use bias tape right!

I found a tutorial on making your own bias tape - something I've done lots of times before. And then, I read her instructions for actually sewing it on. It was life changing!  I've always just sandwiched it in, and never been very happy with the results.  This is so much better!

Of course, you don't actually see the bias tape on the top:

But it still, I love the contrast.

The only thing I'd change is the amount of elastic on the cover. You do actually need 4 yards, but only to thread it through.   Once I pulled it tight, I used only about 2 yards.


BWS tips button

HookingupwithHoH


Thursday, September 1, 2011

my big church bag- and a GIVEAWAY!


A few months ago, I was "upgraded" in my church calling. I now have way too much responsibility (though, at least I'm not president!) and a big honkin binder I need to lug everywhere.

My cute really cheap tote bag was now not adequate for all the stuff I need. So I was on the hunt for a nice huge bag to take to church.

While looking for a fabulous purse to maybe sew, I stumbled up on this tote bag pattern:

Super easy, and cute too.

I mostly followed her easy instructions, with just a few changes.

First of all. I needed it to have a much wider bottom. So instead of making the bottom triangles 4" (it will make sense when you read the pattern), I made mine 7".

I also added pockets and an extra bottom pattern like she did in her other version.

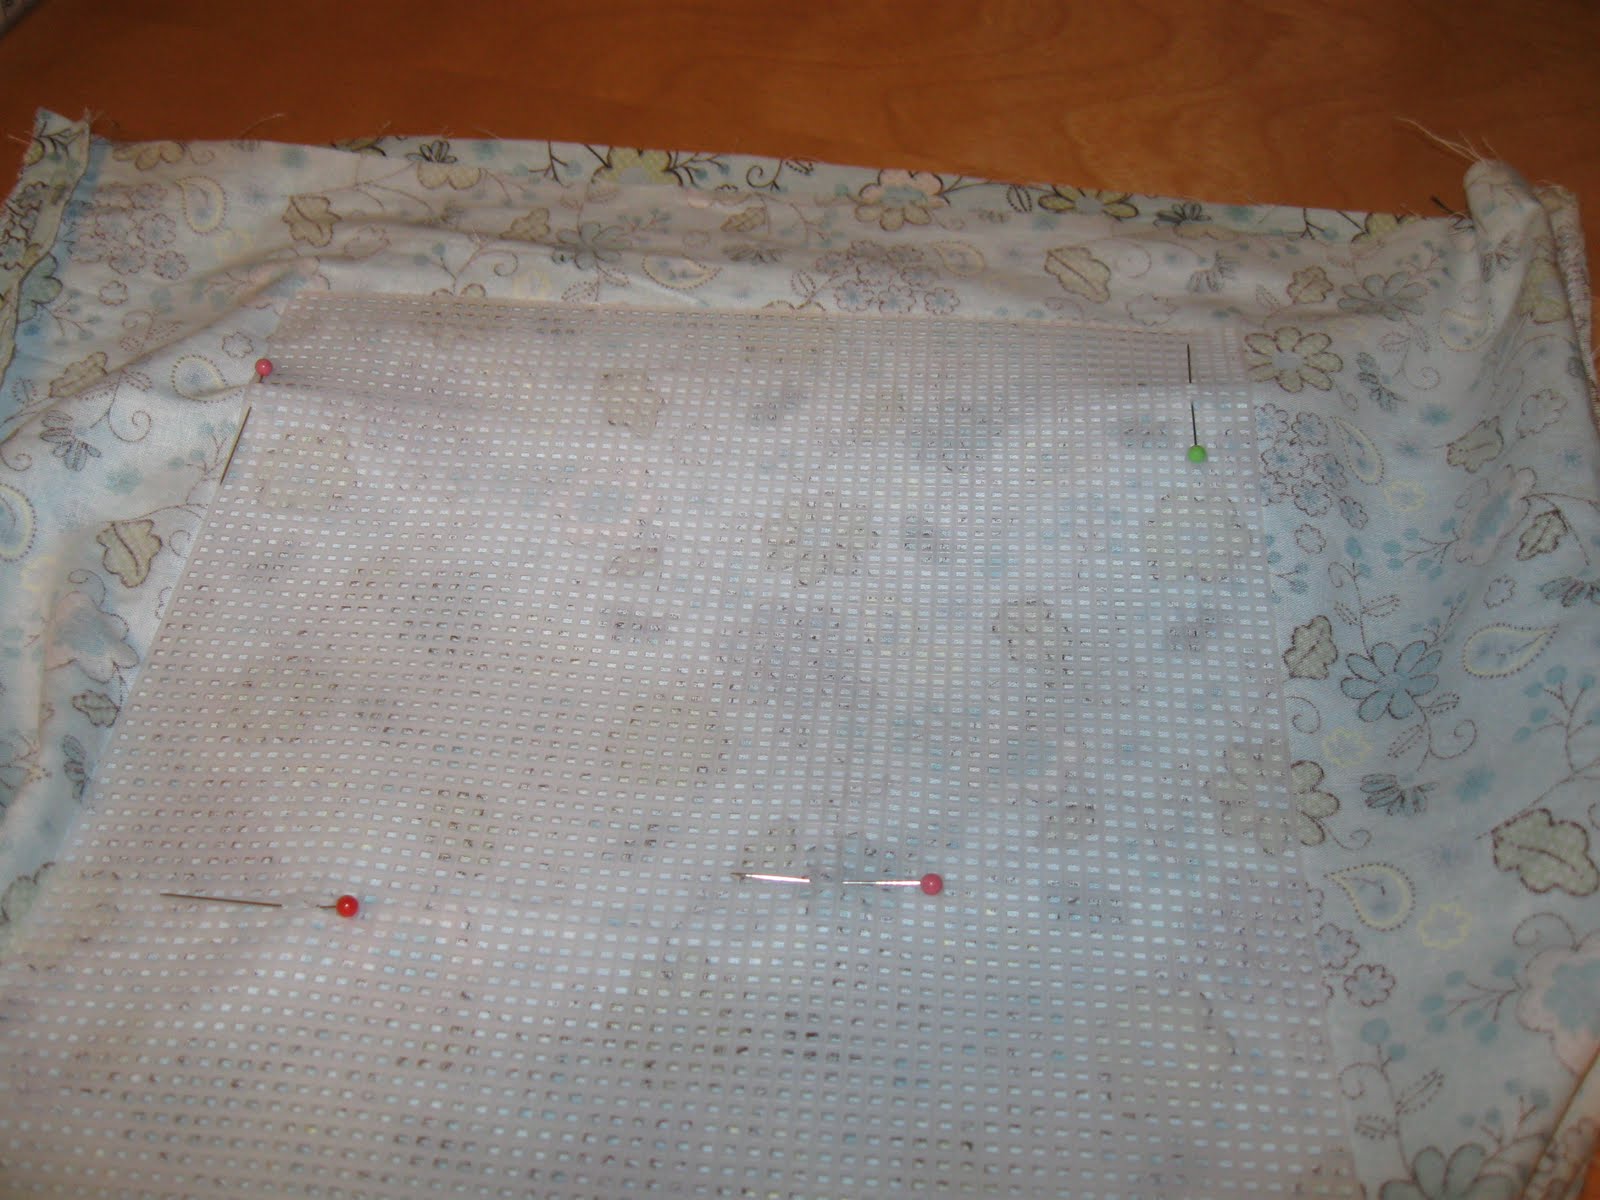
While finding a purse to sew, many people suggested using plastic canvas to make it stiff and stand on its own.  The tote pattern suggested fusible fleece. After seeing the price tag on that stuff (it was almost $8 a yard!), I went for the plastic canvas option ($0.45 each!).  Here's how I did that part.

I made the lining just as the pattern instructs. After cutting off the bottom triangle thingies, I lined up a piece of plastic canvas with the bottom corners:

And pinned it all over to keep it from moving around.

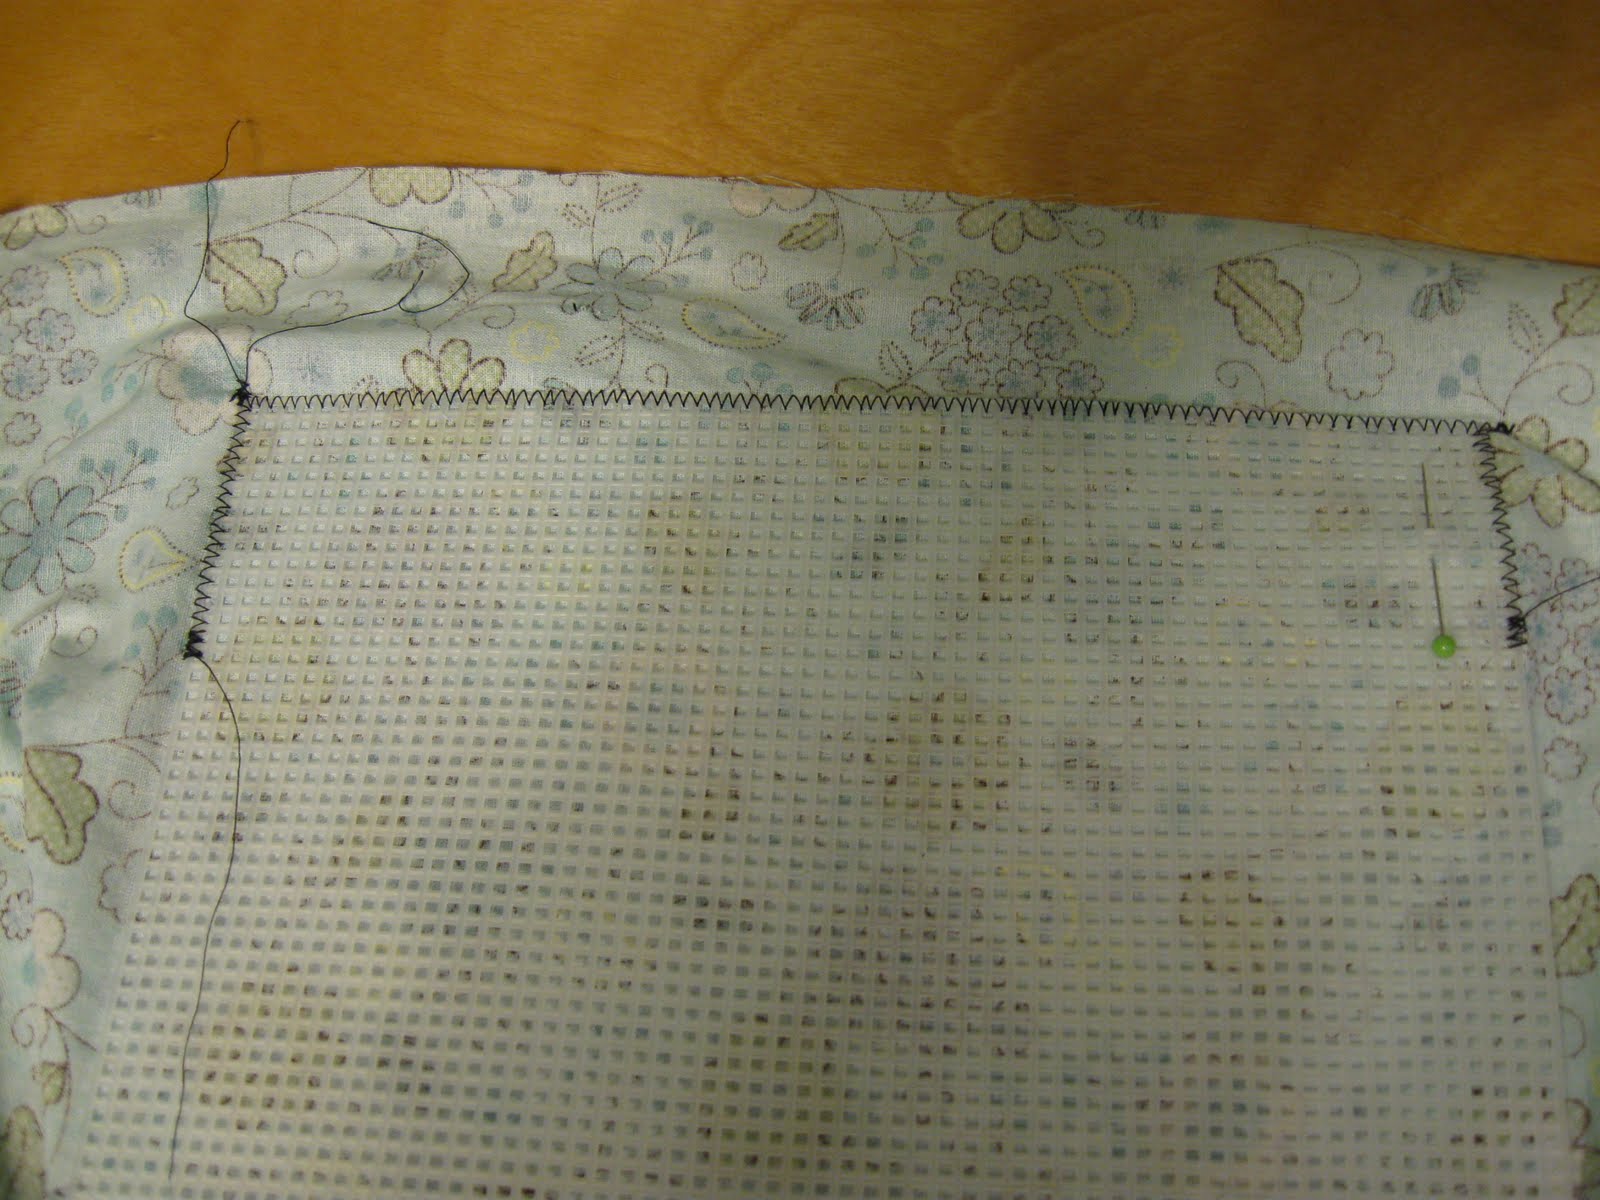
Then, I just VERY SLOWLY zigzagged around.

No, my stitch length didn't exactly line up with the openings of the canvas. That's why I went slow. I could actually feel the needle slip off the plastic into the squares once and a while.

I wasn't sure I could actually sew around all 4 sides on both pieces, so I just did a bit along the top & sides to make sure it didn't slide everywhere.


I repeated this with the other side

And . . .

Tada!


I'm super happy with it.  I didn't think about the fact that increasing the bottom would decrease the sides, and I wish it would have been about an inch taller:

But still, it's so nice that I can actually fit everything in there!


So, on to the giveaway. . . I bet you guys are thinking I'm giving one of these bags away, right. WRONG!

Guess what came in my mailbox the other day . . .


Yup! Book 6 in the Sadie Hoffmiller series.

Guys, don't read this one at night.  It's kind of creepy.  And there's a big old plot twist, again, that I did NOT see coming, but changed a ton for me.  You'll love it.  And,

To win your own signed-by-the-author copy, leave me a comment with either the title of a book you love, or a book you'd like to read.  Comments will close Sunday, Sept 4 at 7:00 central time, and I'll announce a  winner Monday morning!


*disclaimer shma:  I received two copies of this book as part of my participation in the test kitchen.  But I only give one away, 'cause I want to keep one too!


BWS tips button

HookingupwithHoH


Blogging tips