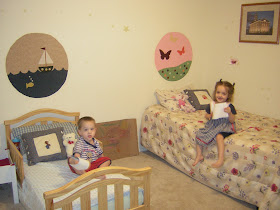
The biggest part of this wall was just dejunking the closet. The magnet board you can see HERE, and the bookshelf is a rain gutter just like I used in THE GIRL'S ROOM.
I did the mural myself.
It was based on a project I did several years ago in my apartment. It was the first time I used fabric starch to attach fabric to the wall.
(look how little my kids are!)
I found a picture online that I liked and copied. To make the mural, I drew a big circle on the wall, and traced the different parts, and just painted in the lines. Everyone talks about needed really good brushes to do something like this. But I pulled it off with a 10 cent sponge brush and one of my kid's watercolor brushes for the little stuff. You just have to be really patient and slow.
The starfish I found at a local store. But the life preserver just might be my very favorite thing in the whole room.
When looking for sailboat decor, I found several life preservers for $10-15. But they were just painted Styrofoam. I knew I could make it for much less.
So here's my supplies.
Pretty simple, huh. I knew the rope around the perimeter needed to be thicker, so I braided 4 strands of jute together, and made sure it was long enough to go clear around the wreath.

Then I painted the wreath, wrapped the rope and wreath with jute (in single thickness this time), and secured it with hot glue. I'm so happy with how it turned out!
Price list for this wall:
Starfish: $5
Wreath: $2.50 (40% off coupon)
Magnet board: $3
Rain gutter: free (left over from girls room)
Mural: free (left over paint)
Total cost this stage: $10.50
Total so far for room: 30.50


Firstly, this is super cute.
ReplyDeleteSecondly, I don't approve of you blogging today, because according to my research (place that quote) you should be coming to visit me (Ok, and other family members) today. So, less Blogging, and more traveling to see me/us! :) (OK, I'm sure you had time, I'm just excited to see you!)
I have been looking all over pinterest for how to DIY a life preserver for my son's 1st bday; I bought the foam ring but didn't think I could use paint OR hot glue on it; how did you do it without it eating up the styrofoam? thanks in advance!!
ReplyDeleteKate, I hope you look here because you didn't leave any contact info! I just used regular craft acrylic paint. It didn't eat up the foam at all. And once the paint is on, it acts as a barrier for the hot glue so it won't melt the foam. I do think the green foam is better than the white foam for stuff like this though.
Deletethanks!! I will try it out!
ReplyDeleteCan't wait to try this, I am planning a "Ahoy it's a boy" baby shower
ReplyDelete